
Cat Wall Shelf Layout Guide: How to Plan a Climbing Route Your Cat Will Actually Use
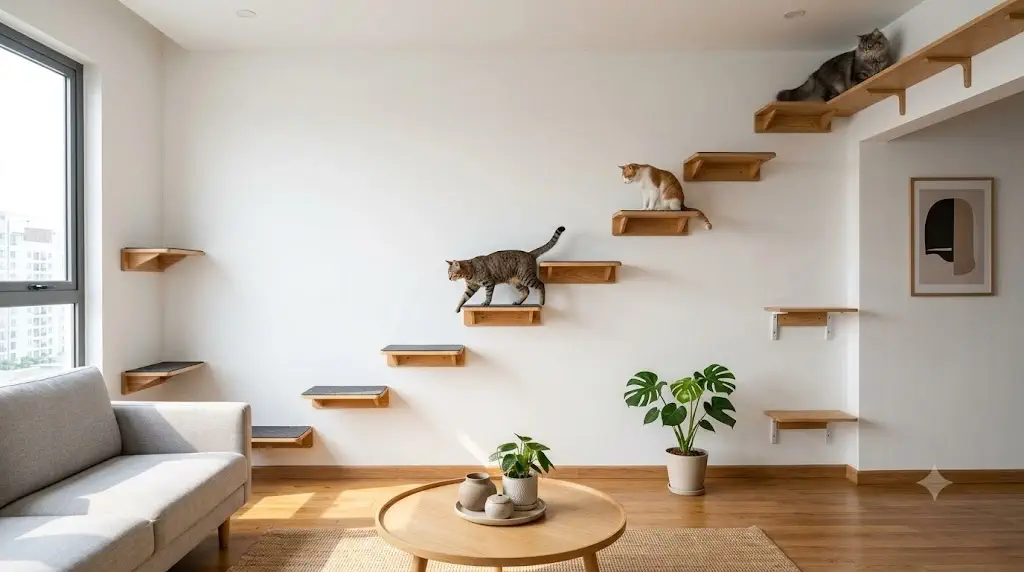
The best cat wall shelf layout is not the one with the most shelves. It is the one that gives your cat a clear starting point, manageable transitions, useful resting platforms, and a reliable way back down without wasting valuable wall space. For most adult cats, a practical starting range is 12–18 inches of vertical separation between climbing surfaces, while kittens, senior cats, or less confident cats generally benefit from shorter transitions. Horizontal gaps should be treated separately from vertical spacing, because a cat needs both a reachable landing surface and enough room to approach it comfortably.
Quick Answer: How Should Cat Wall Shelves Be Arranged?
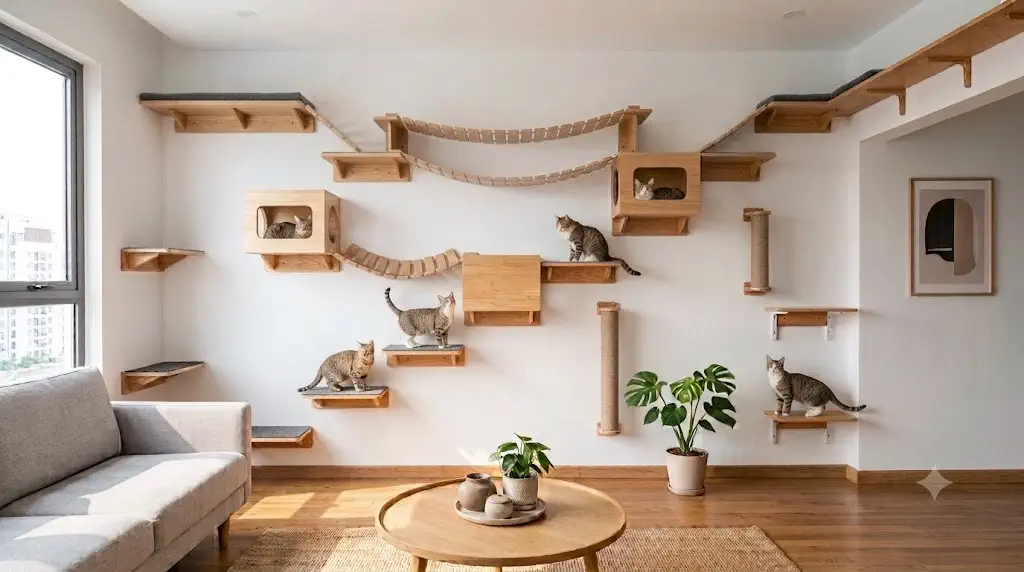
A safe cat wall shelf layout arranges platforms in an offset diagonal route spaced 12 to 18 inches vertically, anchored directly into 16-inch center wall studs using 2.5-inch structural wood screws. Begin from an existing launch spot (such as a floor post or sofa arm), alternate transit steps sideways to maintain a continuous climbing line, and ensure high resting points provide a secondary descent loop rather than a dead-end drop.
- Vertical spacing: 12–18 inches for agile adult cats; 8–12 inches for senior cats and kittens.
- Horizontal clearance: 10–14 inches lateral offset between steps for natural jumping arcs.
- Hardware standard: #8 or #10 structural wood screws penetrating at least 1.75 inches into wood studs.
- Dynamic load tolerance: 40+ lbs instantaneous shear rating to absorb dynamic landing shock.
- Layout pattern: Staggered diagonal or continuous loop paths; avoid straight vertical ladders.
- Safety rule: Never rely on plastic expansion drywall anchors or adhesive perches for cats over 8 lbs.
| Specification Parameter | Standard Benchmark | Structural Rationale |
|---|---|---|
| Vertical Step Interval | 12–18 inches (Adults) / 8–12 inches (Seniors) | Prevents joint hyperextension during repeated leaps |
| Horizontal Separation | 10–14 inches center-to-center offset | Creates forward landing momentum clearance |
| Minimum Overhead Headroom | 18–22 inches below ceilings/soffits | Allows adult felines to stand upright and groom |
| Dynamic Impact Force | 3×–4× feline body mass (36–48 lbs instantaneous) | Terminal landing deceleration converts mass to kinetic shear |
| Minimum Fastener Rating | 2.5″ #8/#10 screws in studs; 3/16″ toggles in drywall | Resists rotational cantilever pull-out leverage |
Why Cat Wall Shelf Layout Determines Safety and Route Utilization
Cat wall shelf layout determines feline route safety and usage frequency far more than shelf aesthetics or total piece count. A collection of premium ledges fails if shelf positions force awkward mid-air turns, lack claw purchase, or lead to sudden drop-offs.
Cats experience vertical architecture as a kinetic circuit: an initial launch, sequential deceleration landings, a territorial vantage point, and a predictable descent path. When intermediate drops are too steep or platforms lack turning room, domestic cats abandon the wall altogether to prevent injury.
That makes layout the system-level decision. Product selection comes after it.
The Key Planning Principle:
Design the route first. Select the individual shelves second. Once you know where the entry, transitions, rest points, high destination, and descent route need to be, you can choose shelves that physically fit those positions.
How Individual Feline Biomechanics Dictate Shelf Dimensions
Individual feline biomechanics dictate optimal shelf spacing based on spinal length, age, musculoskeletal health, and body mass. The same vertical space that challenges a 16-pound Maine Coon might overwhelm a 7-pound juvenile or an arthritic senior feline.
Before measuring the wall, observe what your cat already does naturally:
- How high does your cat routinely jump onto furniture?
- Does it prefer short repeated jumps or larger leaps?
- Does it turn around comfortably on narrow surfaces?
- Does it use the back of a sofa as a launch point?
- Which windows, furniture pieces, and elevated locations does it already prefer?
- Does it confidently descend from high furniture?
- Does another cat compete for the same elevated locations?
These observations provide practical baseline data. Engineering your wall around your cat’s everyday comfortable movements protects long-term joint health and guarantees steady daily use.
Cat Wall Shelf Spacing: The Standard Engineering Dimensions
Standard cat shelf engineering requires 12 to 18 inches of vertical rise paired with 10 to 14 inches of horizontal offset for agile adult cats. These baseline parameters align with feline stride kinetics, giving cats clear visual lines to land securely on their pads.
| Layout Element | Practical Starting Point | What Changes It |
|---|---|---|
| Vertical shelf-to-shelf rise | 12–18 in | Age, agility, confidence, height of route |
| Kittens / senior cats | About 8–12 in | Mobility and jumping confidence |
| Horizontal transition | Keep within demonstrated ability | Approach angle, platform depth, cat size |
| Resting platform | Wider and deeper than transit shelf | Cat body size and preferred sleeping position |
| High destination | Enough clearance to sit, turn, and leave | Ceiling height and cat size |
A 12–18-inch vertical range serves as the ideal benchmark across professional feline architectural design. For geriatric felines or kittens under six months, tighten vertical transitions to 8–12 inches to reduce landing shock.
If your cat can make a particular jump once, that does not mean the jump belongs in the main daily route. A better layout leaves some margin between the cat’s demonstrated ability and the most demanding transition.
Why Staggered Diagonal Routes Outperform Vertical Ladders
Staggered diagonal routes provide continuous landing sightlines and natural approach angles that vertical ladders physically obstruct. When shelves are mounted straight above one another, the upper shelf blocks the cat’s view during ascent and creates a dangerous vertical drop during descent.
    [ REST / VIEW PLATFORM ]
              |
       [ Shelf C ]
          /
  [ Shelf B ]
      \
    [ Shelf A ]
         |
     [ ENTRY ]
This layout creates a diagonal climbing path instead of forcing the cat to jump almost vertically from one shelf to the next.
The shelves do not need to form an exact 45-degree line. The real objective is establishing comfortable consecutive landing zones that match your room’s stud layout.
Why staggering works:
- The cat can see the next landing clearly before committing to a jump.
- Each transition provides a shallow approach angle that minimizes joint stress.
- The route can navigate around doors, furniture, windows, and framing studs.
- It creates distinct transit zones that prevent spatial crowding.
- It makes adding secondary bypass routes simple in multi-cat homes.
How Platform Functions Divide Into Entry, Transit, and Destination Zones
A balanced cat wall divides platforms into three distinct functional roles: entry access points, intermediate transit steps, and resting destinations. Treating all wall components as identical ledges wastes wall space and creates routes without comfortable resting areas.
1. Entry platforms
The entry platform is where the cat steps into the vertical highway. It can connect from the floor, a low ledge, a sofa back, a credenza, or a cat tree. The entry must feel welcoming and accessible without demanding a difficult vertical jump right away.
2. Transit platforms
Transit shelves bridge different sections of the wall. They prioritize traction and compact dimensions over sleeping space, serving one core purpose: facilitating safe passage to the next landing point.
3. Destination platforms
Destination platforms provide spacious perches where cats can sprawl, groom, survey the room, and nap. These require deeper and wider dimensions (minimum 10×18 inches) and sturdy structural support to handle hours of lounging.
Think of the wall as a route with movement spaces plus destination spaces. Not every component needs to be a lounge, and not every component should be a tiny step.
Why Intermediate Pause Points Prevent Feline Panic and Hesitation
Intermediate pause points give climbing felines flat staging areas to reorient their balance and assess room dynamics without sudden slips. In an indoor environment, forcing a cat through five uninterrupted jumps creates mental hesitation and physical fatigue.
Installing a wider pause platform midway through the climb lets your cat stop, turn its head, and decide whether to ascend higher, turn around, or pause to observe floor activity.
A pause platform serves several essential functions:
- Resting between active vertical jumps
- Monitoring lower-level household movements
- Safely changing direction along the wall
- Allowing another feline room to pass by
- Setting up a controlled, stable descent
- Connecting toward a nearby window or perch
Integrating these wider transitional stops ensures the wall remains a welcoming, stress-free space rather than an exhausting physical obstacle course.
Why Descent Route Engineering Protects Feline Forelimbs from Shock
Descent route engineering protects feline carpal joints and forelimb bones from dynamic landing forces three to four times resting body mass. When descending vertically, a cat cannot see landing pads beneath its body without bending its neck at an acute downward angle, making steep drops disorienting and stressful.
Most cat owners focus on getting the cat upward, neglecting the return path. If coming down feels unstable or awkward, cats may jump straight to the floor, risking sprained wrists or bruised pads over time.
Before drilling your highest platform, audit the descent path in reverse:
- Where does the cat exit the highest platform?
- Is the next downward step clearly visible from above?
- Can your cat turn around comfortably on the perch to prepare for descent?
- Is there an intermediate platform to absorb downward momentum?
- Does the route finish near a stable piece of furniture or an area rug?
- Could a second cat easily trap the climbing cat at the top?
Always confirm that downward steps are slightly shallower than upward bounds to keep landing shock well within safe limits.
A top shelf with only one difficult exit may become a poor destination, especially in a multi-cat household. The higher the route goes, the more valuable predictable exits become.
How Multi-Cat Layouts Resolve Territorial Choke Points and Social Conflict
Multi-cat highway layouts resolve social friction by providing redundant movement routes and passing zones that prevent territorial ambushes. In a home with multiple felines, an elevated runway must manage social dynamics, ensuring dominant cats cannot corner more timid housemates on high dead-end shelves.
Use route redundancy
If the highest vantage point has only one approach path, a dominant cat can block that access point and claim the entire area. Adding a secondary exit route lets a subordinate cat slip away without facing physical confrontation.
Create wider passing zones
Narrow transit ledges create stress when two cats meet going opposite directions. Position wide pause platforms at intersections so two cats can comfortably pass each other without an accidental fall or swatting match.
Separate sleeping areas from traffic lanes
A cat settling in for a deep nap should not be disturbed by another cat bounding down the wall. Set private resting pods slightly away from the main climbing corridor to maintain quiet relaxation zones.
A durable multi-cat layout includes:
- At least one primary climbing path and one secondary escape descent
- Alternative exits from every major resting perch
- Multiple high destination spots across the room
- Wider passing platforms at high-traffic junctions
- Dedicated quiet resting shelves away from direct transit corridors
Designing with traffic redundancy in mind helps you build a calm, enriching vertical environment that supports peaceful multi-cat living.
How Small-Room Layouts Maximize Tight Vertical Wall Space
Small-room cat wall layouts maximize tight floor plans by using vertical zigzags and wall-to-wall corner transitions that preserve floor area. Rather than running broad horizontal shelves across a small room, stack compact steps upward to open up underutilized vertical air space.
Small-wall strategy:
- Pick a tall, uninterrupted wall run away from high-traffic doorways.
- Use an existing sofa arm, low desk, or cat tree as the starting point.
- Stack shelves in a staggered vertical pattern rather than spreading horizontally.
- Reserve your largest shelf for the very top destination point.
- Turn the climbing path around a 90-degree corner to extend total route length.
- Keep door swings, floor walkways, picture frames, and wall decor unobstructed.
If your main constraint is compact apartment square footage, check out our comprehensive Best Cat Wall Shelves and Best Space-Saving Cat Furniture guides for space-saving selections.
Remember: smart small-space design starts with the route footprint, not simply buying the smallest shelves you can find online.
How Window Layouts Combine Environmental Enrichment with Safe Access
Window cat layouts combine essential visual enrichment with safe climbing access, turning outdoor views into rewarding destination perches. Outdoor sightlines of birds and street activity offer valuable mental stimulation, making window perches the most popular spots in the house.
An effective window-facing route follows this clear progression:
    [ WINDOW DESTINATION ]
               |
        [ REST PLATFORM ]
            /
     [ TRANSIT SHELF ]
         \
     [ ENTRY SHELF ]
            |
        [ FLOOR ]
Avoid making the window perch a dead end. Whenever possible, add a second exit so your cat can leave easily if startled by outdoor noises or sudden window movements.
Check your surroundings carefully before mounting. Keep platforms clear of blinds cords, fragile decor, floor lamps, or doors that could strike a cat resting on the sill.
How Existing Furniture Integration Cuts Installation Costs and Hardware Footprints
Integrating existing furniture into your cat wall reduces drywall anchor penetrations and provides stable, familiar entry points. Connecting your wall shelves to the sturdy back of a sofa, a low cabinet, or a heavy bookcase saves wall space and reduces the total number of shelves you need to mount.
This integration creates an efficient, low-profile route:
    [ HIGH REST PLATFORM ]
                |
          [ TRANSIT ]
            /
     [ TRANSIT ]
          /
   [ SOFA BACK ]
          |
        FLOOR
Before using furniture as a launch pad, confirm it is completely stable and cannot tip over during a leap. Never position a shelf where a leaping cat might land on a television, loose lamp, or sharp table corner.
How Room Architecture and Door Swings Influence Wall Route Layouts
Room architecture and door clearance envelopes dictate shelf heights to prevent open doors from striking climbing cats or mounted brackets. Even a spacious wall becomes a hazard if shelves sit directly within a door swing or obstruct primary household walkways.
Map out all permanent wall fixtures before drilling your first hole:
- Door frames and full door-swing radiuses
- Window sashes and blind cords
- Closet doors and pocket door framing cavities
- Light switches and wall thermostats
- Electrical wall outlets
- HVAC return vents and heat registers
- Wall-mounted televisions and speaker brackets
- Framed artwork and mirrors
- High-traffic human walkways
- Heavy furniture footprints
Treat your wall as an architectural blueprint before selecting hardware. Planning around room features protects both human walking paths and feline safety.
How Landing Envelopes Determine Safe Overhead and Lateral Clearances
A safe landing envelope requires at least 18 to 22 inches of vertical clearance and 10 to 14 inches of unobstructed lateral room. Without adequate overhead clearance, jumping felines must contort their bodies mid-flight to avoid hitting their heads on ceilings or shelves.
- Functional spacing: Can the cat move from one platform to the next with natural balance?
- Environmental spacing: Can your cat stand, stretch, and turn around comfortably without hitting the ceiling, door frames, or adjacent ledges?
A layout might satisfy simple step distances yet fail because overhead space is cramped. For example, a cat can easily jump to an upper shelf, but won’t use it if there isn’t room to stand upright without crouching under the ceiling.
Always measure the full landing envelope rather than just looking at the shelf platform dimensions.
The landing envelope is the three-dimensional clearance zone around a platform needed for a cat to approach, land, absorb impact, turn around, and launch safely into the next stride.
Why Painter’s Tape Wall Prototyping Exposes Layout Flaws Before Drilling
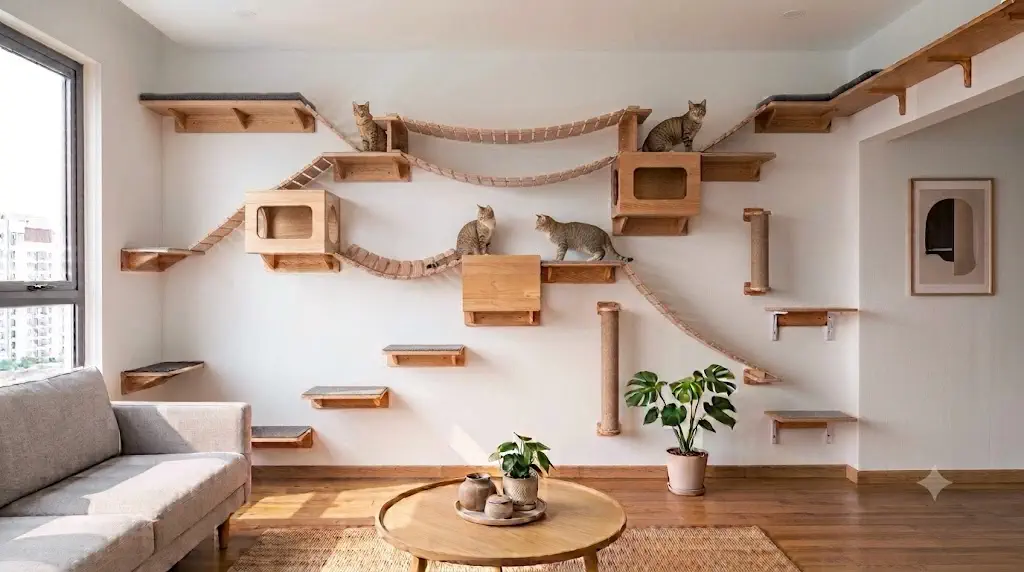
Prototyping shelf footprints with painter’s tape exposes clearance errors and awkward jump angles before drilling into drywall. Outlining the full dimensions of each shelf on your wall gives you a clear look at real-world scale and flow without making a single mark.
Use blue painter’s tape to mark the exact width and depth of each planned platform, then step back across the room to evaluate the entire route.
Check these five things:
- Can you visually follow the route smoothly from entry to the highest perch?
- Does each shelf provide a natural landing line to the next one?
- Are larger resting platforms placed in quiet spots where your cat naturally likes to sleep?
- Is the return path down clearly visible and comfortable?
- Does any part of the route interfere with human head clearance or walking paths?
Mocking up the route with tape saves time and prevents unwanted wall repairs, ensuring you only drill holes where platforms work perfectly.
How Wall Stud Spacing Coordinates with Pre-Drilled Cat Shelf Brackets
US residential wall framing follows a standard 16-inch on-center stud spacing that must align with pre-drilled bracket holes for secure mounting. If your shelf’s pre-drilled bracket holes do not match your wall’s framing layout, you must adapt the design to avoid weak mounting points.
Map out your ideal climbing route first, then use a stud finder to locate the structural framing members behind your drywall.
Most heavy-duty shelves are built around standard 16-inch or 24-inch stud centers. If a specific bracket misses a stud in a low-impact walking area, use a 3/16-inch zinc toggle bolt rated for dynamic hollow wall loads.
Never compromise your cat’s safety by placing a shelf in an awkward jumping spot just to hit a stud. Instead, adjust the broader sequence slightly or use heavy-duty toggle anchors where appropriate.
For heavy adult breeds like Maine Coons, combine your wall route with a grounded heavy tower from our best cat trees for large cats collection to distribute kinetic landing forces.
Four Field-Tested Cat Wall Layout Patterns and Architectural Strengths
Four proven cat wall shelf layouts provide versatile, reliable structures for varied room shapes and feline temperaments. Selecting the right pattern depends directly on your room layout, available wall studs, and how many cats use the space.
1. Staircase layout
Shelves step gradually upward from one side of the wall to the other in a clean ascending line.
- Best for: Simple rooms, first-time installations, and straightforward wall runs.
- Strength: Intuitive climbing path that is easy to map across wall studs.
- Weakness: Consumes wide horizontal wall spans.
2. Zigzag layout
Shelves alternate left and right, climbing vertically up the wall in a compact footprint.
- Best for: Narrow wall sections and rooms with limited horizontal space.
- Strength: Creates a tall vertical climb within a compact footprint.
- Weakness: Demands careful spacing so upper shelves don’t overhang lower landing pads.
3. Corner layout
The route transitions seamlessly across an inside corner onto an adjoining perpendicular wall.
- Best for: Apartments and smaller rooms where a single wall is too short.
- Strength: Transforms empty, unused corner wall space into active territory.
- Weakness: Demands accurate corner bracket alignment and careful jumping angle checks.
4. Loop or circuit layout
The layout forms a continuous path with multiple entry and exit points back to the floor.
- Best for: Multi-cat households and larger open living spaces.
- Strength: Eliminates single-entry dead ends and reduces territorial friction.
- Weakness: Requires greater wall area and additional mounting points.
Common Cat Wall Layout Mistakes and Engineering Fixes
Common cat wall layout mistakes stem from mounting shelves too close together, neglecting descent angles, or using slick unpadded surfaces. Addressing these frequent design oversights keeps your cat confident and active on the wall.
Putting every shelf at the same height
A single horizontal row of shelves looks uniform, but fails to build dynamic vertical territory. Create varied vertical elevations to encourage active jumping and exploration.
Making every jump equally difficult
Avoid designing the route as a series of maximum-effort leaps. Blend easy, short steps with occasional longer bounds to keep the climb enjoyable and safe.
Using only small platforms
Compact steps work well for transitions, but make poor resting perches. Always provide wider destination shelves where cats can stretch out and nap securely.
Creating a single-entry high platform
Dead-end high perches lead to territorial standoffs in multi-cat homes. Add a secondary descent route to keep traffic moving freely.
Ignoring descent
A route that is easy to climb can still feel hazardous on the way down. Always map out the descent path before fixing your highest platforms.
Filling the wall before checking the room
A cat wall must fit into the room naturally without blocking door swings, windows, light switches, or primary family walking areas.
Choosing products before measuring
Buying shelves before taking measurements leads to awkward spacing and wasted money. Map your route and wall studs first, then choose shelves that fit those exact positions.
Step-by-Step Protocol to Build a Dynamic Cat Wall Layout
Building a functional cat wall follows a strict twelve-step sequence from preliminary measurement to final structural fastening. Working step by step helps prevent common installation mistakes and ensures your shelves stay solid for years of daily use.
- Measure the usable wall: Record width, ceiling height, and the exact positions of doors, windows, switches, outlets, and vents.
- Mark the cat’s starting point: Choose a stable launch spot from the floor, sofa arm, or low piece of furniture your cat already uses.
- Choose the destination: Determine whether the main goal is a window perch, high ceiling runway, or quiet sleeping pod.
- Draw the route: Sketch a smooth climbing line connecting the entry to the destination using natural diagonal steps.
- Set vertical spacing: Use 12 to 18 inches as a starting baseline for adult cats, reducing to 8 to 12 inches for senior cats or kittens.
- Offset the shelves: Stagger platforms sideways to maintain comfortable, clear landing sightlines.
- Add rest platforms: Intersperse wider, padded ledges for lounging along the climbing route.
- Plan the descent: Check the return path down from the highest platform to confirm there are no steep drops.
- Check multi-cat traffic: Add secondary escape paths and bypass loops if several cats share the room.
- Mark the layout with tape: Tape full-size shelf outlines onto the wall to verify dimensions and clearance.
- Check mounting locations: Use an electronic stud finder to align critical jump perches with solid 16-inch framing studs.
- Select matching hardware: Purchase shelves, bridges, and scratchers that match the specific mounting points and dimensions you mapped out.
How Platform Roles Determine Furniture and Hardware Selection
Platform roles determine furniture specifications by matching shelf depth, surface traction, and bracket strength to specific locations. Once your layout is finalized, choosing individual shelves becomes straightforward and purposeful.
| Position in the Layout | What to Prioritize |
|---|---|
| Entry | Easy access, stable surface, appropriate height |
| Transit | Usable landing area, traction, compact footprint |
| Turn / pause | More surface area, comfortable footing |
| Rest destination | Depth, width, comfort, stable mounting |
| Window destination | Viewing position, comfortable perch, clear exit |
| Multi-cat intersection | Wider platform and route redundancy |
If you are comparing specific shelf brands and models, visit our Best Cat Wall Shelves review. Always treat layout planning and product selection as complementary steps: plan the route first, then choose the right shelves to bring that route to life.
A Five-Tier Architectural Layout Formula for Climbing Systems
A five-tier layout formula organizes vertical space into Entry, Transit, Pause, Destination, and Descent zones. This architectural framework guarantees that every component serves an intentional purpose along the path.
Before drilling into your wall, ask these five fundamental questions:
- Where does your cat naturally enter the climbing route?
- Can your cat reach the next step without using its absolute maximum jump?
- Where can your cat pause to rest or turn around?
- What makes the highest destination appealing and worthwhile?
- How does your cat get back down without a steep or awkward final drop?
Answering these questions ensures you build a dynamic climbing route that your cat will enjoy every day.
Pre-Drill Cat Wall Shelf Layout Verification Checklist
A pre-drill verification checklist prevents wall anchor failures and spatial bottlenecks before installing mounting hardware. Check off each item below to verify your installation plan:
- □ The first shelf is reachable from the floor or an existing piece of furniture.
- □ Vertical transitions are appropriate for the individual cat.
- □ Shelves are staggered where a straight vertical route would be awkward.
- □ There are dedicated resting platforms, not only transit shelves.
- □ The highest platform has enough clearance for the cat to use it comfortably.
- □ The descent route has been planned before installation.
- □ Multi-cat routes do not depend on one narrow bottleneck.
- □ Doors, windows, furniture, vents, outlets, and walkways have been considered.
- □ Full-size shelf footprints have been taped onto the wall before drilling.
- □ Mounting positions have been checked against the wall structure.
- □ Each component has a defined purpose within the route.
- □ The layout works without requiring the cat to make repeated maximum-effort jumps.
Frequently Asked Questions About Cat Wall Shelf Layouts
How far apart should cat wall shelves be?
A practical starting point for many adult cats is about 12–18 inches of vertical separation. Kittens, senior cats, and less confident cats benefit from shorter 8–12 inch transitions. Final spacing should reflect your cat’s demonstrated jumping ability rather than a generic maximum.
Should cat wall shelves be staggered?
Yes, cat shelves should be staggered diagonally. A staggered layout provides clear sightlines for upcoming landings, supports natural jumping arcs, and prevents steep, hazardous vertical drops when cats descend.
How high should the first cat wall shelf be?
Mount the first cat shelf 12 to 20 inches from the floor, or directly level with an adjacent sofa arm or low cabinet. An accessible starting point encourages climbing without demanding an aggressive vertical jump.
Should the highest cat shelf have two exits?
Yes, high platforms should provide two exit points, particularly in multi-cat homes. A secondary escape route prevents territorial cats from cornering housemates on dead-end ledges.
How do I design a cat wall for two cats?
Design for continuous traffic flow rather than just adding more shelves. Use wider pause platforms, create multiple resting destinations, and build a loop layout that eliminates single-track bottlenecks.
Can a sofa be the first step in a cat wall?
Yes, a stable sofa arm or back serves as an excellent launch point. Using existing furniture provides a familiar stepping stone and reduces the number of holes you need to drill in your wall.
Should I buy cat shelves before planning the layout?
No, always plan your layout and verify stud positions first. Once you know where entry points, transit steps, and resting perches belong, you can choose shelves with dimensions and brackets that fit your wall.
How can I test a cat wall layout before drilling?
Use blue painter’s tape to map full-scale shelf footprints directly onto the wall. Step back to check vertical spacing, landing envelopes, and clearance around door swings before drilling holes.
The Bottom Line on Cat Wall Shelf Layout Engineering
A successful cat wall functions as an integrated feline transit highway, not a decorative assortment of floating wall shelves. Prioritizing your cat’s natural movement patterns, structural wood studs, and safe descent angles creates a lasting climbing space your cat will use every day.
Begin with your cat’s typical jumping habits, anchor into 16-inch center wall studs, stagger transitions diagonally, and plan an accessible return route before fixing the highest platform. In multi-cat homes, incorporate route redundancy so elevated spaces remain calm, open, and free of territorial bottlenecks.
